Hey, garden lovers! Ever wondered how to turn your kitchen scraps and yard waste into something magical for your plants? Composting at home is not only easy but also a fantastic way to enrich your soil naturally. In this guide, I’ll walk you through simple steps to make your own compost, transforming everyday waste into nutrient-rich gold for your garden. Let’s dive in and get started!
Why Composting Matters
Environmental Benefits
- Reduces Landfill Waste: Composting diverts organic waste from landfills, decreasing methane emissions—a potent greenhouse gas.
- Recycles Nutrients: It returns valuable nutrients back to the soil, promoting sustainable gardening practices.
- Enhances Biodiversity: Compost enriches the soil microbiome, supporting a diverse range of beneficial organisms.
Gardening Benefits
- Improves Soil Structure: Compost enhances soil aeration and water retention, crucial for plant health.
- Suppresses Plant Diseases: A healthy soil microbiome can reduce the incidence of certain plant diseases.
- Cost-Effective: Producing your own compost reduces the need for commercial fertilizers and soil amendments.
Understanding the Basics: The Science of Composting
Composting is a natural process of decomposition. Microorganisms like bacteria and fungi break down organic materials into humus, the dark, nutrient-rich component of soil. The key factors influencing this process are:
- Carbon to Nitrogen Ratio (C:N): Ideal is around 30:1.
- Moisture: Compost should be moist but not waterlogged.
- Aeration: Oxygen is essential for aerobic decomposition.
- Particle Size: Smaller pieces decompose faster due to increased surface area.
Getting Started: What You’ll Need
Materials
- Compost Bin or Pile: Options include store-bought bins, DIY wooden bins, tumblers, or simple open piles.
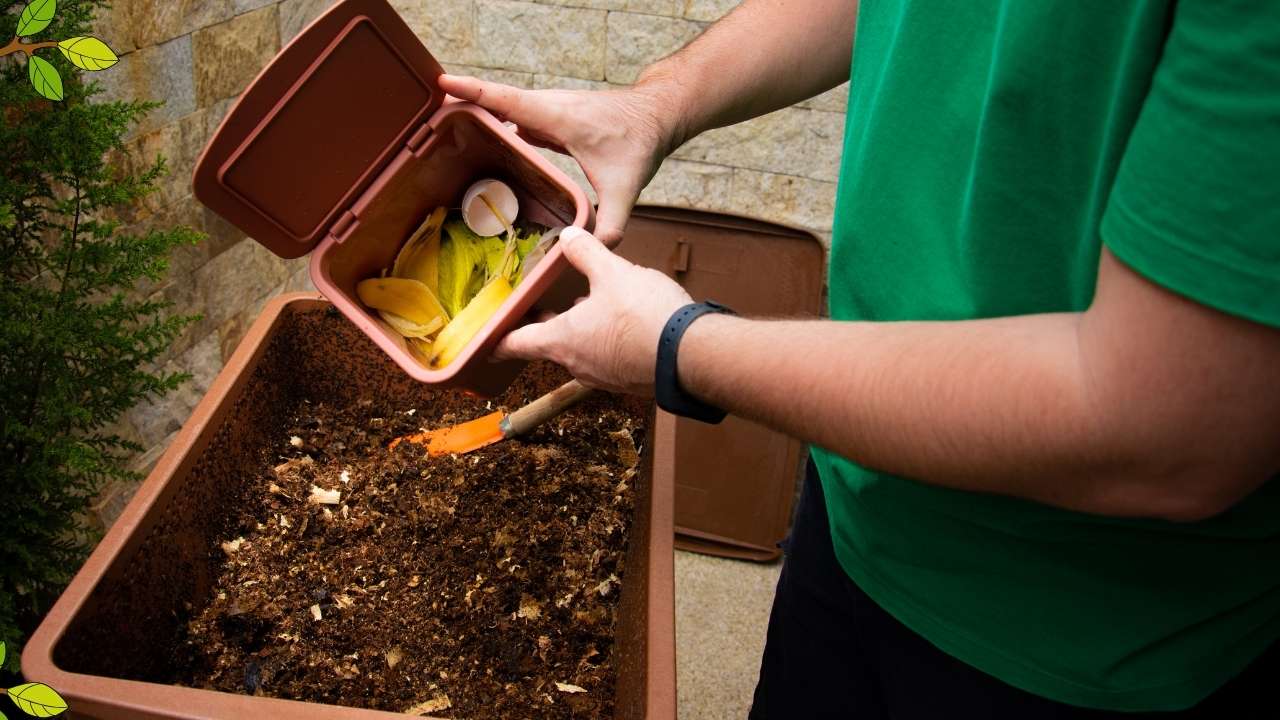
- Organic Waste: A balanced mix of “greens” (nitrogen-rich) and “browns” (carbon-rich).
- Water Source: For maintaining moisture.
- Garden Fork or Compost Aerator: For turning the compost.
Greens (Nitrogen-Rich Materials)
- Fruit and vegetable scraps
- Coffee grounds and filters
- Grass clippings
- Tea bags (non-plastic)
Browns (Carbon-Rich Materials)
- Dry leaves
- Straw or hay
- Shredded newspaper (non-glossy)
- Cardboard (uncoated and shredded)
- Wood chips and sawdust (in moderation)
Items to Avoid
- Meat and dairy products
- Oils and fats
- Pet waste
- Diseased plants
- Weeds with seeds
- Glossy or colored paper
Step-by-Step Guide to Composting at Home
Step 1: Choose the Right Composting Method
Depending on your space and needs, select a composting method:
- Traditional Compost Pile: Great for large yards.
- Compost Bin: Ideal for smaller spaces; helps contain the compost.
- Tumbling Composter: Easy turning mechanism accelerates decomposition.
- Trench Composting: Bury organic waste directly in the garden.
Step 2: Select an Appropriate Location
- Accessibility: Choose a spot that’s easy to reach year-round.
- Drainage: Ensure the area doesn’t collect standing water.
- Sun Exposure: Partial shade is ideal; sunlight aids in heating the pile but too much can dry it out.
Step 3: Prepare the Base
- Layer of Browns: Start with a 6-inch layer of coarse browns like twigs or straw to aid airflow.
- Soil Layer (Optional): Adding a layer of garden soil can introduce beneficial microorganisms.
Step 4: Add Greens and Browns Alternately
- Layering Technique: Aim for layers of browns and greens about 2-4 inches thick.
- Maintain the C:N Ratio: Remember, approximately 3 parts browns to 1 part greens by volume.
Step 5: Maintain Moisture
- The Squeeze Test: The compost should feel like a damp sponge. If it’s too dry, add water; if too wet, add more browns.
- Covering: Use a tarp or lid to retain moisture and heat.
Step 6: Aerate Regularly
- Turning the Pile: Use a garden fork to turn the compost every 1-2 weeks, bringing outer materials to the center.
- Oxygen Flow: Aeration prevents foul odors and speeds up decomposition.
Step 7: Monitor Temperature
- Ideal Range: Active composting occurs between 110°F and 160°F.
- Thermometer Use: A compost thermometer can help monitor the internal temperature.
Step 8: Troubleshoot Common Issues
- Odor Problems: Usually due to excess greens or poor aeration. Add browns and turn the pile.
- Slow Decomposition: Could be due to dry conditions or lack of nitrogen. Moisten and add greens.
Step 9: Harvest the Finished Compost
- Maturity Signs: Dark, crumbly texture with an earthy smell; original materials are unrecognizable.
- Curing Period: Allow compost to sit for a few weeks to stabilize before use.
- Application: Mix into garden beds, use as mulch, or create potting mixes.
Recent Breakthroughs in Composting
Aerated Static Pile Composting
- What It Is: A method that uses air pumps to supply oxygen, eliminating the need to turn the pile.
- Benefits: Faster composting times and reduced labor.
- Applications: Ideal for larger-scale operations but adaptable for home use with the right equipment.
Compost Accelerators
- Enzymes and Microbes: Commercial products that introduce specific bacteria strains to speed up decomposition.
- DIY Options: Adding finished compost or mature manure can act as a natural activator.
Digital Compost Monitors
- Technology Integration: Devices that monitor moisture, temperature, and aeration levels.
- Smart Composting: Some systems can automate aeration and watering based on sensor data.
Potential Applications and Future Trends
Community Composting Programs
- Shared Resources: Neighborhood composting sites reduce individual workload.
- Education: Programs often include workshops and resources for participants.
- Environmental Impact: Larger scale composting can significantly reduce community waste.
In-Home Composting Appliances
- Compact Machines: Countertop composters that dehydrate and grind food waste.
- Quick Turnaround: Some promise compost within 24 hours.
- Considerations: Energy use and initial cost versus long-term benefits.
Integration with Urban Gardening
- Rooftop and Balcony Composting: Tailored solutions for small spaces.
- Composting in Schools: Educational programs teaching children about sustainability.
My Composting Success Story
A few years ago, I struggled with a compost pile that just wouldn’t heat up. After some research, I realized my pile was too small and lacked sufficient greens. I started collecting coffee grounds from a local café and added grass clippings from my neighbor. Within a week, the pile’s temperature soared, and the decomposition process kicked into high gear. This experience taught me the importance of pile size and the right balance of materials.
Tips and Tricks for Effective Composting
- Chop and Shred Materials: Smaller pieces decompose faster. Run over leaves with a lawnmower or chop kitchen scraps.
- Layering Isn’t Strict: While layering helps, mixing materials works just as well.
- Seasonal Adjustments: In colder months, insulate the pile with straw or leaves to retain heat.
- Use a Compost Thermometer: Monitoring temperature can provide insights into how well your compost is progressing.
- Invite Earthworms: They help break down materials faster and enrich the compost with their castings.

Common Composting Problems and Solutions
| Problem | Possible Causes | Solutions |
|---|---|---|
| Compost Smells Rotten | Too wet, lack of oxygen, excess greens | Add browns, turn the pile, improve drainage |
| Pile Attracts Rodents | Presence of meat/dairy, exposed food | Avoid prohibited items, cover food scraps with soil |
| Compost is Dry and Dusty | Not enough moisture, too many browns | Moisten the pile, add greens, cover to retain moisture |
| Slow Decomposition | Cold weather, large particles, imbalance | Increase pile size, chop materials, adjust C:N ratio |
Advanced Composting Techniques
Hot Composting
- Faster Results: Compost can be ready in 1-3 months.
- Requirements: Larger pile (at least 3x3x3 feet), regular turning, optimal C:N ratio.
- Benefits: Kills weed seeds and pathogens due to higher temperatures.
Cold Composting
- Less Labor-Intensive: Minimal turning required.
- Longer Process: Takes 6 months to 1 year.
- Ideal For: Gardeners who aren’t in a rush and have limited time.
Vermicomposting
- Uses Worms: Red wigglers consume organic waste, producing nutrient-rich castings.
- Indoor Friendly: Can be done indoors with a worm bin.
- Benefits: Produces high-quality compost, reduces household waste.
The Future of Composting
Composting Toilets
- Eco-Friendly Waste Management: Human waste is composted, saving water and reducing sewage.
- Applications: Off-grid living, eco-friendly homes.
Municipal Composting Services
- Curbside Pickup: Some cities offer organic waste collection for centralized composting.
- Community Impact: Reduces landfill use and provides compost for public spaces.
Compostable Packaging
- Biodegradable Materials: Increased use of compostable plastics and packaging.
- Home Composting Compatibility: Encourages consumers to compost packaging at home.
Conclusion
Composting at home is more than just a gardening technique—it’s a commitment to environmental stewardship and sustainable living. By transforming waste into valuable soil amendment, we not only enhance our gardens but also contribute to a healthier planet. Whether you’re a seasoned gardener or just starting out, composting is a rewarding practice that pays dividends in lush plants and bountiful harvests.
So, gather those kitchen scraps, rake up the leaves, and let’s embark on this composting journey together. Your garden (and the Earth) will thank you!
2 thoughts on “How to Make Compost at Home Step by Step: A Gardener’s Guide”