Imagine stepping into your garden after a light rain, the plants looking refreshed and vibrant. Now, picture capturing that rain to keep your garden thriving even during dry spells. Exciting, right? Let’s dive into how you can make that happen!
Why Harvest Rainwater?
I’ve always believed that nature provides us with all we need, and rainwater is no exception. Harvesting rainwater isn’t just about saving on your water bill—it’s a sustainable practice that benefits both your garden and the environment.
Benefits at a Glance:
- Conserves Water: Reduces demand on municipal water supply.
- Saves Money: Lowers your water bills.
- Healthier Plants: Rainwater is free from chemicals found in tap water.
- Environmental Impact: Decreases stormwater runoff, reducing soil erosion.
Getting Started with DIY Rainwater Harvesting
You might think setting up a rainwater harvesting system is complicated, but trust me, it’s easier than you think. Let’s explore some methods you can try at home.
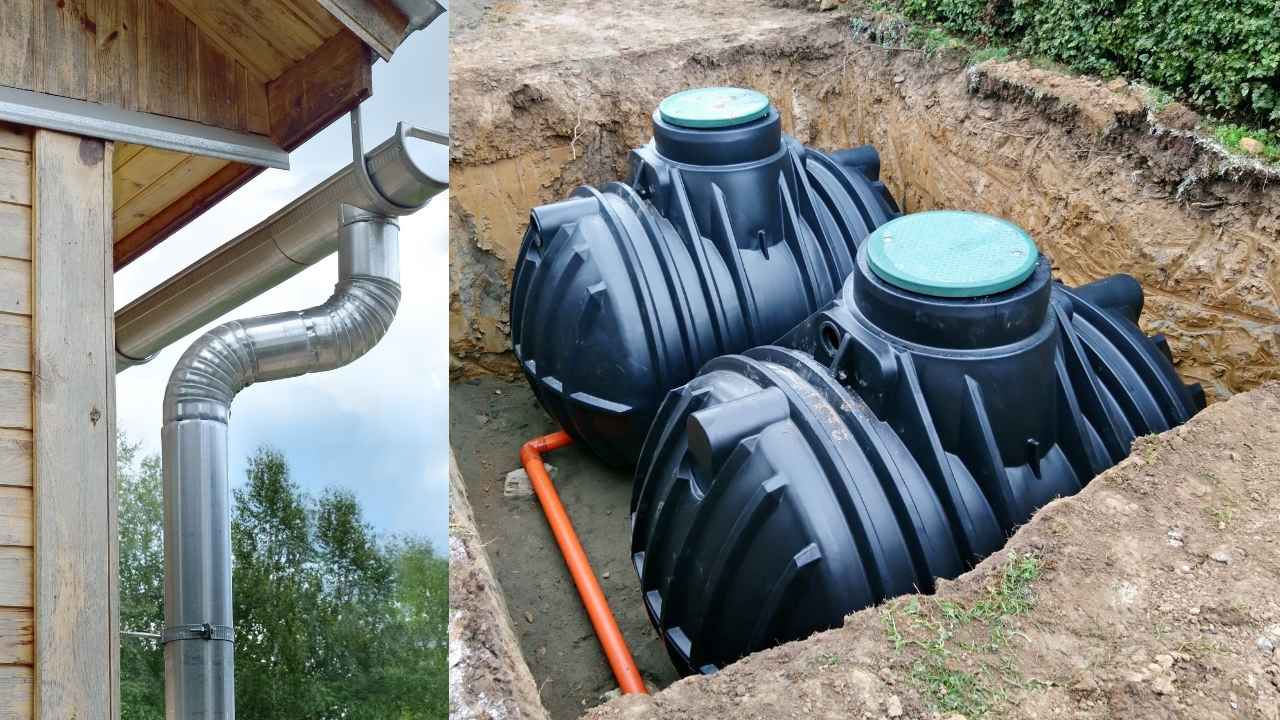
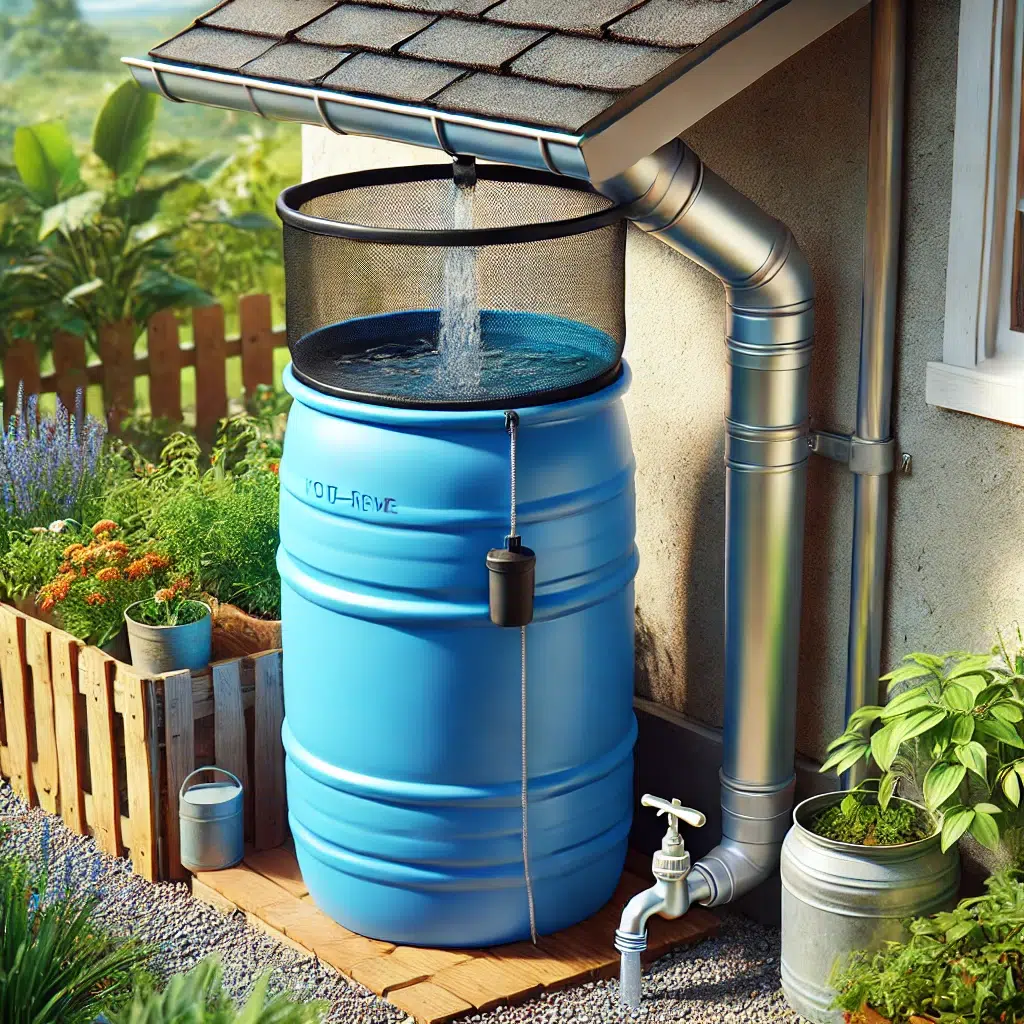
1. The Classic Rain Barrel
What You’ll Need:
- A sturdy barrel (50-100 gallons)
- Gutter downspout diverter
- Mesh screen
- Spigot and overflow valve
Steps:
- Choose the Right Barrel: Opt for food-grade plastic barrels to avoid contaminants.
- Set Up the Location: Place the barrel beneath a downspout.
- Install the Diverter: Connect the downspout to the barrel using a diverter kit.
- Add a Screen: Place a mesh screen on top to keep out debris and mosquitoes.
- Attach the Spigot: Install it near the bottom for easy access to the water.
2. Create a Rain Garden
A rain garden is a planted depression that allows rainwater runoff to be absorbed.
Benefits:
- Enhances the beauty of your garden.
- Supports local wildlife and pollinators.
- Reduces erosion and runoff.
How to Build One:
- Select the Site: Choose a low-lying area at least 10 feet from your home.
- Test the Soil: Ensure good drainage by performing a percolation test.
- Excavate the Area: Dig 6-12 inches deep.
- Add Compost: Mix in to improve soil quality.
- Plant Native Species: They require less maintenance and support local ecosystems.
3. Install Swales and Berms
These are shallow ditches (swales) and raised areas (berms) that control water flow.
Usage:
- Directs rainwater to where it’s needed most.
- Prevents erosion on sloped properties.
Implementation:
- Design the Layout: Map out where water naturally flows.
- Excavate Swales: Dig along the contour lines of your property.
- Build Berms: Use the excavated soil to create raised areas.
Table: Comparison of Rainwater Harvesting Methods
| Method | Cost | Difficulty | Maintenance |
|---|---|---|---|
| Rain Barrel | Low | Easy | Low |
| Rain Garden | Medium | Moderate | Medium |
| Swales and Berms | Medium | Moderate | Low |
Recent Breakthroughs and Future Trends
In the past few years, rainwater harvesting has seen some exciting innovations.
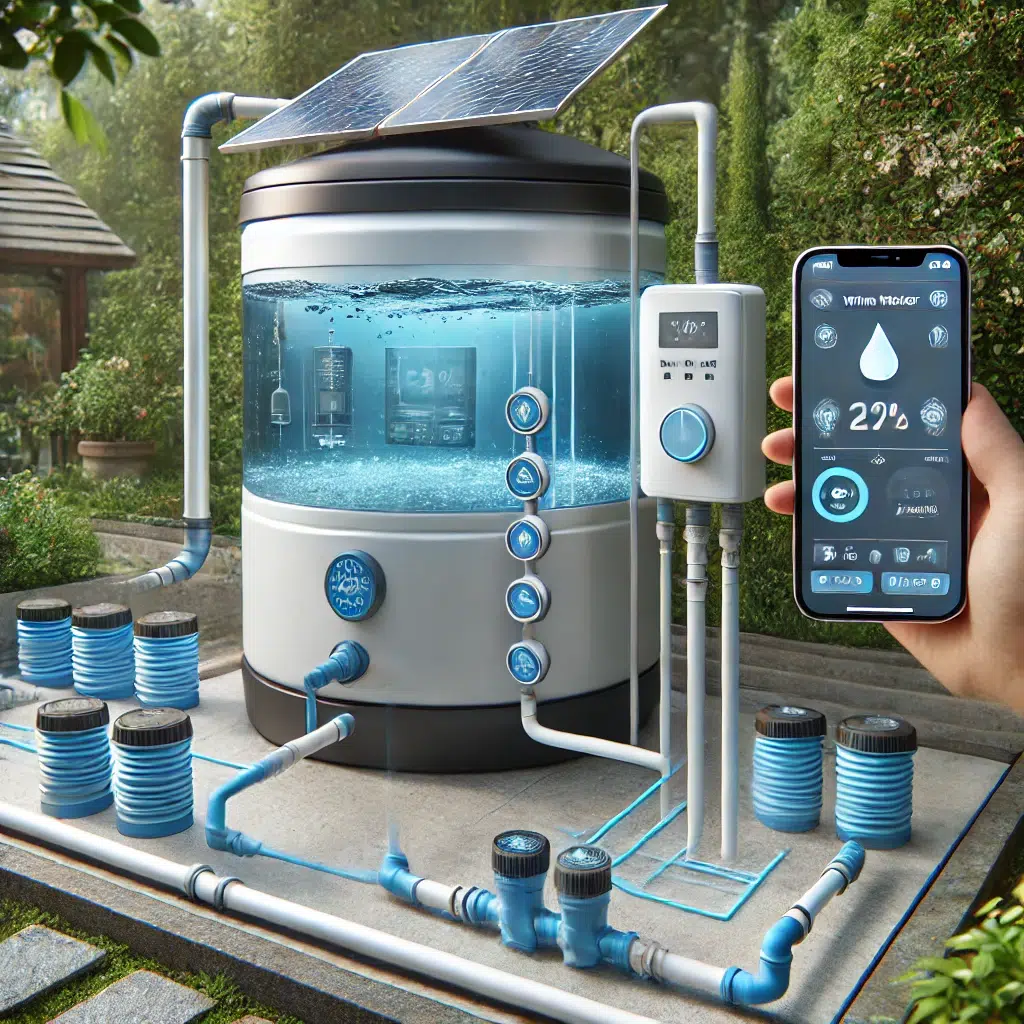
Smart Rainwater Systems
Imagine controlling your harvesting system from your smartphone.
Features:
- Automated valves.
- Sensors for water levels.
- Weather integration to maximize efficiency.
Modular Green Roofs
These systems combine rainwater harvesting with green roofing.
Benefits:
- Insulates your home.
- Provides a habitat for wildlife.
- Captures rainwater for reuse.
Real-World Example: My Own Garden Transformation
Last summer, I installed a simple rain barrel system. Not only did my water bill decrease, but my plants also seemed healthier and more vibrant. The process was straightforward, and the rewards were immediate.
Tips for Success
- Regular Maintenance: Check for clogs and clean your system seasonally.
- Safety First: Secure lids to prevent accidents and mosquito breeding.
- Legal Considerations: Some areas have regulations, so check local laws.
Potential Applications
- Irrigation: Use harvested water for watering plants and lawns.
- Indoor Use: With proper filtration, it can be used for toilets or laundry.
- Emergency Supply: Acts as a backup during water shortages.
Future Trends to Watch
- Rainwater Harvesting Policies: Increased government incentives.
- Community Projects: Shared systems for neighborhoods.
- Advanced Filtration: Making rainwater safe for all household uses.
Conclusion
Harvesting rainwater is a rewarding project that contributes to a sustainable future. Whether you’re a seasoned gardener or just starting, it’s a step worth taking.
So, are you ready to harness the power of rain?
Feel free to share your experiences or ask questions in the comments below!