Gardening has always been a passion of mine, a journey of nurturing life from the soil up. But have you ever planted something with high hopes, only to watch it struggle or fail to thrive? The secret might be hiding right under your feet—in your garden soil. Understanding your soil doesn’t require expensive kits or professional equipment. In fact, with a few household items and a bit of know-how, you can unlock the mysteries of your soil and give your plants the best chance to flourish.
In this post, we’ll explore simple, kit-free methods to test your garden soil. We’ll delve into the basics of soil composition, walk through DIY testing techniques for texture, pH levels, and nutrient content, and share real-life examples from fellow gardeners. By the end, you’ll be equipped with the knowledge to assess your soil and make informed decisions for your garden’s success.
Understanding Soil Basics
Before we get our hands dirty, let’s chat about what soil really is. At its core, soil is a mix of minerals, organic matter, air, and water. The balance of these components determines how well your soil can support plant life.
- Soil Texture: This refers to the proportion of sand, silt, and clay particles. Texture affects drainage, aeration, and nutrient availability.
- Soil pH: The acidity or alkalinity of your soil influences how plants absorb nutrients. Most plants prefer a pH between 6 and 7.5.
- Nutrient Content: Essential nutrients like nitrogen, phosphorus, and potassium are vital for plant growth.
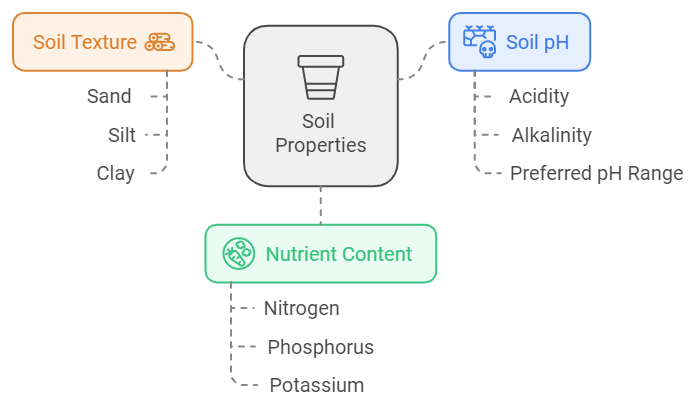
Testing your soil helps you understand these factors, allowing you to amend and improve it for optimal plant health.
Methods to Test Soil Without a Kit
1. The Jar Test for Soil Texture
What You’ll Need:
- A clear glass jar with a lid
- Water
- A shovel
- Liquid dish soap
Steps:
- Collect Soil Sample: Dig about 6 inches deep in your garden and collect enough soil to fill one-third of the jar.
- Prepare the Jar: Add soil to the jar, fill it with water until nearly full, and add a teaspoon of liquid dish soap.
- Shake It Up: Secure the lid tightly and shake the jar vigorously for a few minutes to break up soil clumps.
- Let It Settle: Place the jar on a flat surface and let it sit undisturbed for 24-48 hours.
Observations:
- Sand Layer: Settles at the bottom within a few minutes.
- Silt Layer: Settles on top of the sand after a few hours.
- Clay Layer: Settles last, forming a thin layer on top.
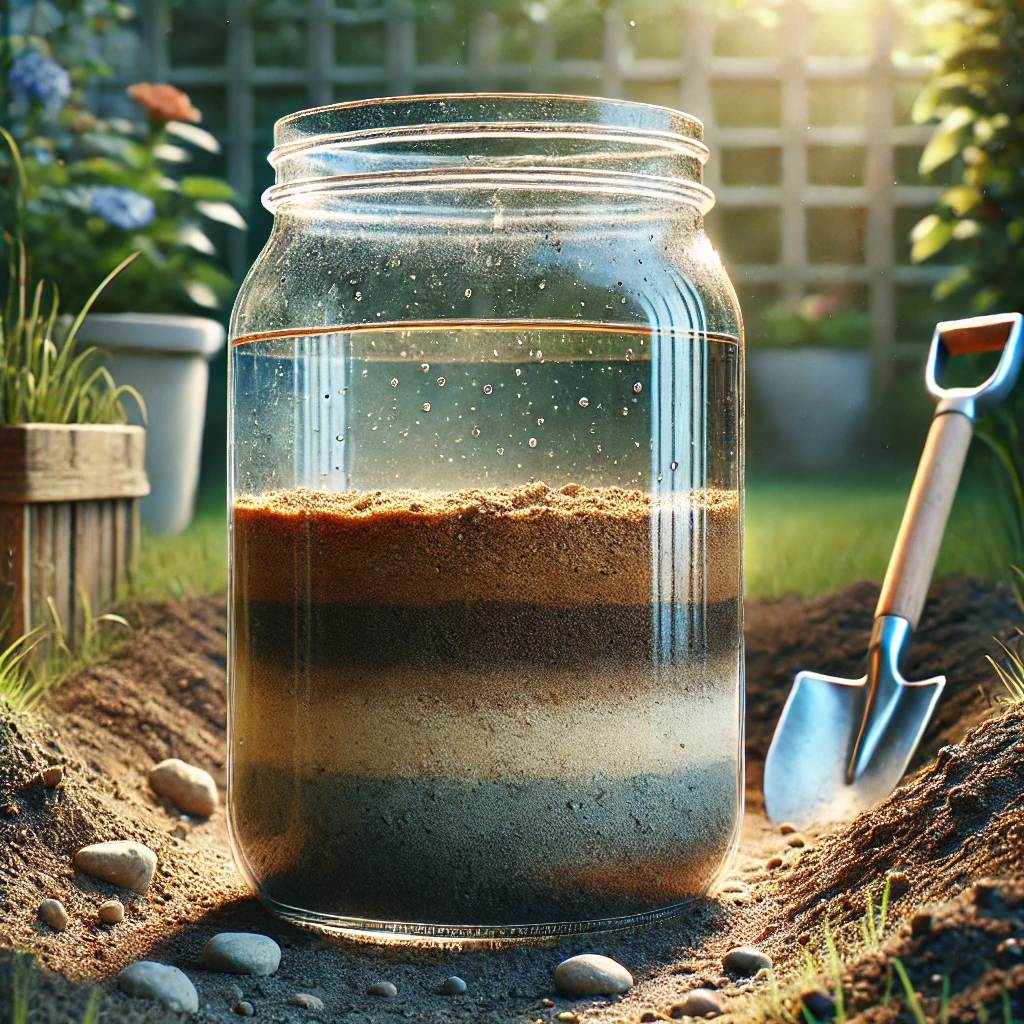
Interpretation:
Measure each layer’s thickness to determine the percentage of sand, silt, and clay. This helps identify your soil type (e.g., sandy loam, clay loam).
Tip: If your soil has a high clay content, consider adding organic matter to improve drainage.
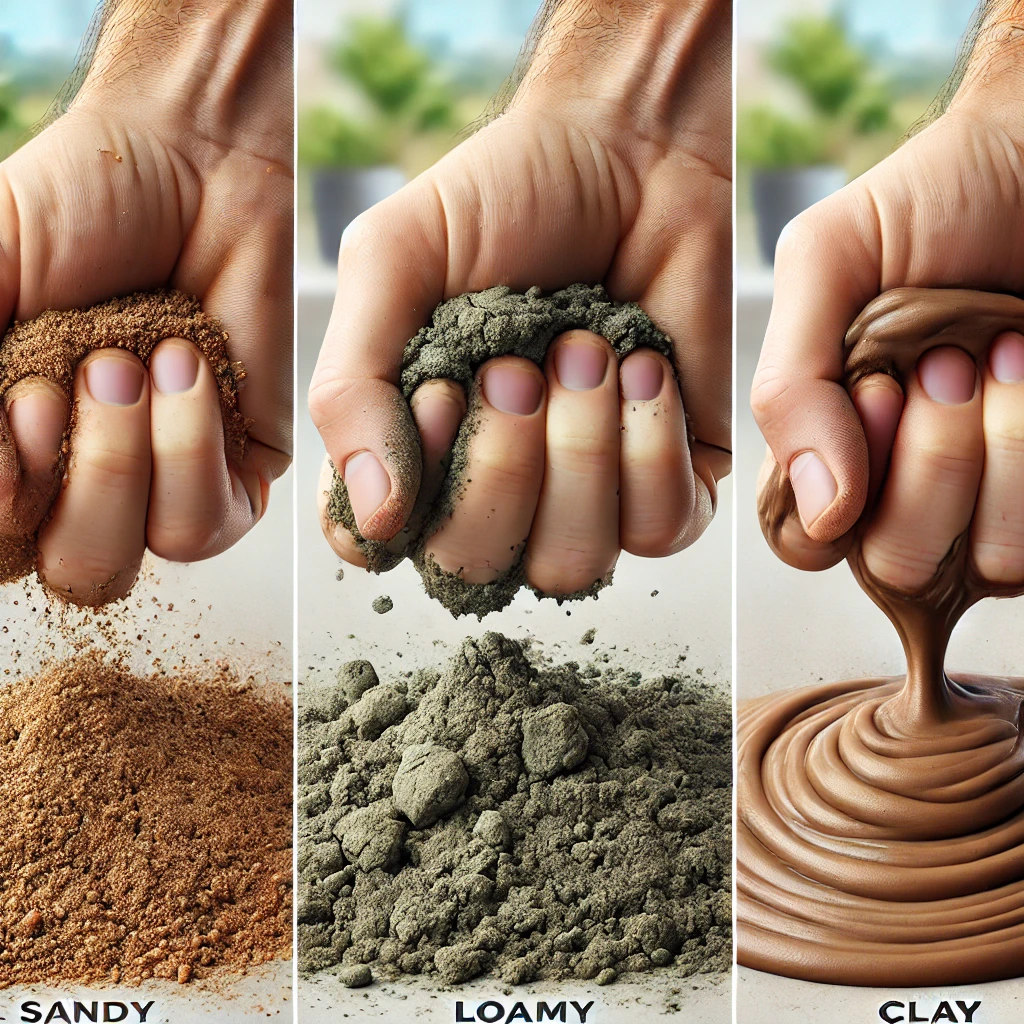
2. The Squeeze Test for Soil Consistency
Simply grab a handful of moist soil and squeeze it.
- Sandy Soil: Falls apart easily and feels gritty.
- Loamy Soil: Holds its shape but crumbles when poked.
- Clay Soil: Molds like plasticine and feels sticky.
This quick test gives you an immediate sense of your soil’s texture and what amendments it might need.
3. DIY pH Test Using Vinegar and Baking Soda
What You’ll Need:
- Two small containers
- Vinegar (white distilled)
- Baking soda
- Soil samples
Steps:
Test for Alkalinity:
- Place a couple of spoonfuls of soil into the first container.
- Add enough vinegar to make it moist.
- Observation: If it fizzes, your soil is alkaline (high pH).
Test for Acidity:
- Place soil into the second container.
- Moisten it with distilled water.
- Add a pinch of baking soda.
- Observation: If it fizzes, your soil is acidic (low pH).
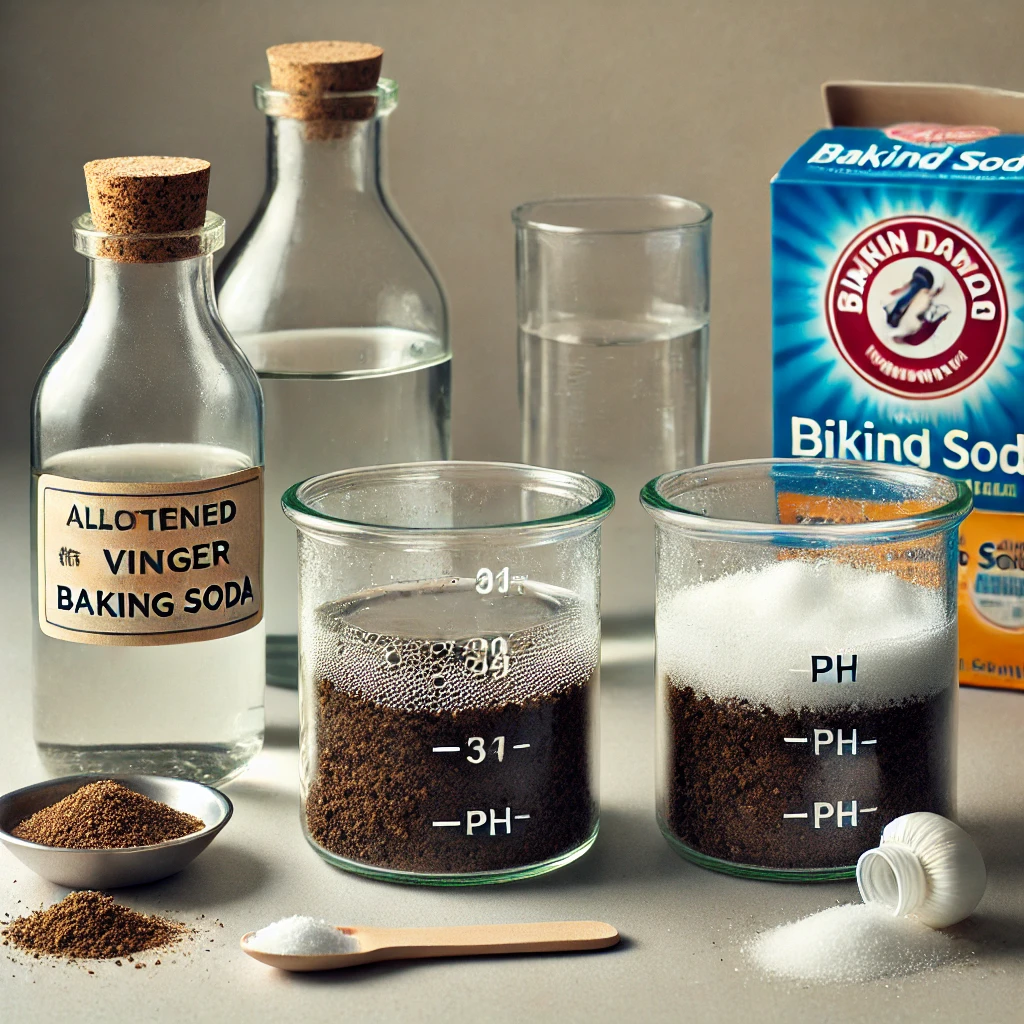
If there’s no reaction in either test, your soil is likely neutral, which is ideal for most plants.
Tip: For acidic soils, consider adding lime to raise the pH. For alkaline soils, sulfur can help lower the pH.
4. Testing for Nutrient Deficiencies Using Plants
Certain plants act as indicators of soil nutrients.
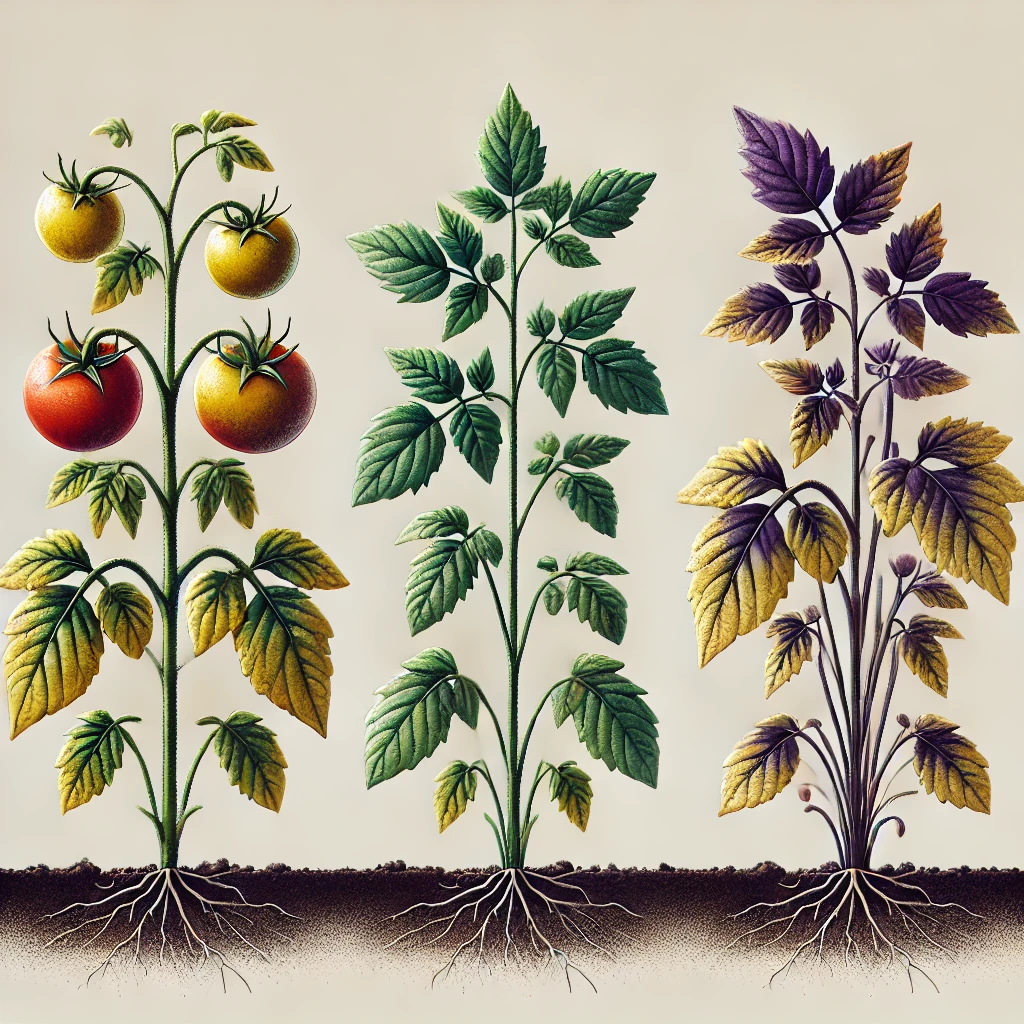
- Nitrogen Deficiency: Yellowing leaves and stunted growth in plants like tomatoes suggest low nitrogen.
- Phosphorus Deficiency: Purple or dark green foliage can indicate a lack of phosphorus.
- Potassium Deficiency: Browning or yellowing leaf edges might mean low potassium levels.
Solution: Incorporate organic fertilizers like compost or manure to boost nutrient content.
Real-World Examples
My Experience with the Jar Test
Last spring, I noticed my vegetable garden wasn’t draining well after rains. I performed the jar test and discovered a high clay content. By mixing in compost and sand, I improved the soil structure, and my tomatoes thanked me with a bountiful harvest!
A Fellow Gardener’s pH Discovery
A friend struggled with hydrangeas that wouldn’t bloom blue. Using the DIY pH test, she found her soil was too alkaline. By adding coffee grounds and pine needles to acidify the soil, her hydrangeas bloomed in vibrant shades of blue the following season.
Conclusion
Understanding your garden soil is the first step toward a thriving garden. By using these simple, kit-free methods, you can uncover valuable insights about your soil’s texture, pH, and nutrient content. Remember, healthy soil leads to healthy plants.
So why not give these tests a try? Share your findings or any tips you have in the comments below. And if you’re eager for more gardening insights, don’t forget to subscribe to our newsletter. Let’s grow together!